Plan your step project to determine step sizes, color and stone styles
 Contact the underground utility location service for your area before digging. This may be done in many areas of the U.S. by calling 811, other jurisdictions may have different phone numbers or contact procedures.
Things You’ll Need
• Safety Glasses
• Gloves
• Level
• Shovel
• Wheelbarrow
• Tape Measure
• Landscape Adhesive
• Gravel
• Rake
• Wood Stakes
• String line
Outline the area in the hill where the RockSteps will go with spray paint. Drive a wood stake at the top and bottom of the site. The stake at the bottom of the hill must be tall enough that a string or tape measure can be strung horizontally between it and the stake at the top of the hill.
If your bottom stake is too short, do this step in stages. All you want to obtain is the linear distance from the top of the hill to the bottom. If done in stages, also measure the distance from string to ground on the lower stake. Write this down because you will add these distances together.
Measuring the 'run'
Measure from the top landing to the bottom along the horizontal line to calculate the length of the hillside. Measure the ‘rise’ (see Fig. 1 below). Measure the distance from the top of the hill to bottom (vertical drop)
Measuring the 'rise'
Measure the distance from the string to the ground (see Fig. 1 below).
Example:
Your RockStep path has a hillside length of 28 feet and a vertical drop of 14’ 6”. The run would then be 28 feet and the rise would equal 14’ 6” feet. (See Fig. 1 below)
Convert the rise into inches; Divide the total rise by 6 inches to figure out the number of steps you need.

Example:
Example:
When using a RockStep that is 18 inches deep the common overlap is 6 inches over the step below leaving a 12 inch step tread (see Fig. 2 above). See Understanding Tread and Common Tread Examples sidebar for other tread options.

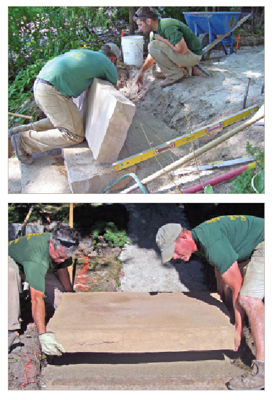
Mark each intended step placement on the run in your hill with spray paint. Always start the install with the bottom step. Dig out the approximate shape of the step 6 inches deep. Fill with a 6” base of ¾” minus crushed rock and top off with ¼” minus crushed rock or sand (for drainage). Pack and tap down gravel firmly before setting your RockStep in place. Keep in mind to impart a slight incline on each step away from the house for correct drainage.
After the first step is installed, measure and dig the second RockStep location. Repeat the above process for the remaining steps being installed. Use a good quality landscape adhesive (see your dealer for recommended adhesives) under each joining lip where each top and bottom step meet. This will keep the steps in place.
Backfill each step with stones or dirt and sod to prevent erosion.
De-icing salts are corrosive to any concrete product. Do not use rock or straight salt for de-icing. Use sand if possible. See your local landscape supplier for de-icing solutions.
Warranty & Specs
RockStep Installation
About RockStep
RockStep Catalog
Events & Shows
Contact RockStep
Norse Building Products, Inc.
Allenton Facility
536 Main Street
Allenton, WI 53002-0126
(262) 629-9330
FAX (262) 629-9982